

Video content has become a part of our daily communication, whether you’re a content creator, social media manager, teacher, or small business owner. From Instagram Reels and TikTok to YouTube content, training videos, or family montages, the need to edit videos regularly is more common than ever.
But here’s the best part: you don’t have to be a pro editor or waste hours learning complex software. With CapCut Desktop, everyday video editing is simple, quick, and surprisingly enjoyable. It even supports handy tools like text to speech, letting you convert written content into audio for voiceovers without having to record anything manually.
CapCut, created by ByteDance (the same folks who brought you TikTok), has established itself with its mobile editor. But the desktop version offers even greater flexibility and control for those who like to edit on a larger screen.
Why CapCut Desktop for Daily Tasks?
Before jumping into the steps, let’s understand why CapCut Desktop is a solid choice for regular video editing:
User-friendly interface: Clean layout with drag-and-drop functionality.
Free to use: No watermark in exports and no secret fees.
Integrated effects and templates: Perfect for rapid polishing.
Both basic and advanced editing are supported: Best for new users and mid-level users.
Cross-platform editing: Begin on desktop and make adjustments on phone if necessary.
Regardless of editing short tutorials, product demonstrations, family videos, or day-to-day social media content, CapCut assists with simplifying the whole process. If you’re short on time, you can even consider integrating an AI video generator to speed up content creation and reduce manual editing work.
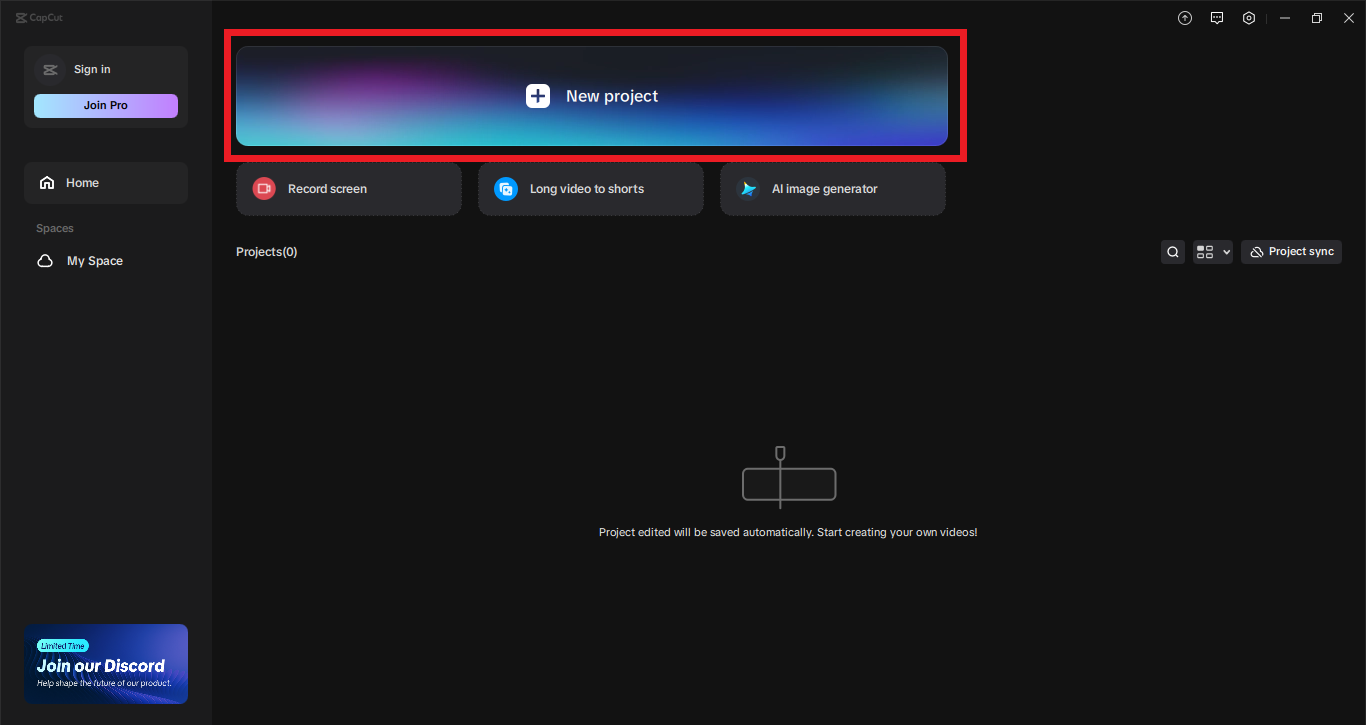
Step 1: Create a New Project in CapCut Desktop
Starting CapCut brings you to the main dashboard. Tap “New Project” to initiate a clean page where you’ll be editing everything. Select your aspect ratio. Drag and drop your video files, photos, music, or screen recordings into the Media Library. CapCut has support for a vast majority of formats, so you’re good no matter what you’re using: phone footage, DSLR footage, or screen grabs. Click and drag your media files down into the Timeline panel. This is where you’ll cut, arrange, and enhance your video. You can have various video and audio layers depending on how complex your project is.
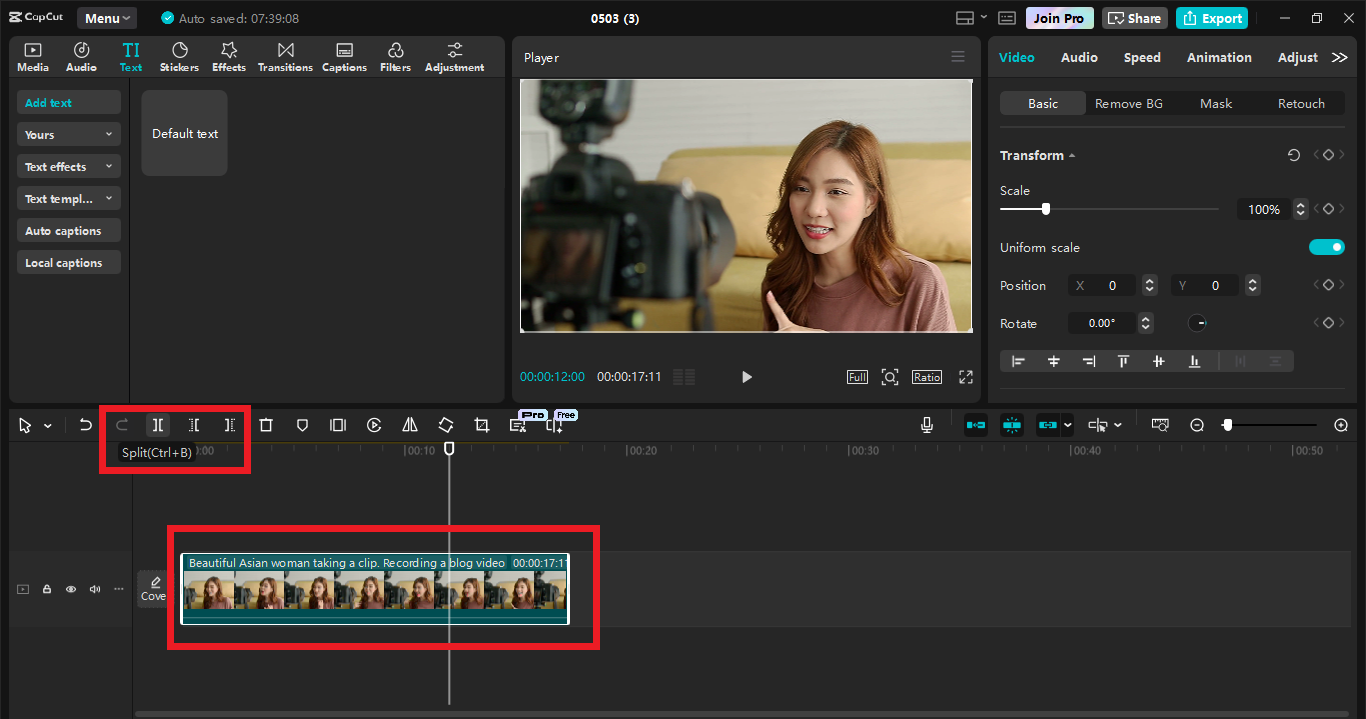
Step 2: Trim and Arrange Clips
Now that your files are within the timeline, it’s time to neaten things up. If you want to Cut Out Extra Sections, apply the Split tool (or press Ctrl + B) to cut a clip in two and cut out pauses, errors, or irrelevant bits. For everyday chores, a tight and tidy edit is paramount—viewers prefer content that is to the point.
Drag and drop clips to rearrange them. You could begin with a hook, followed by the bulk of the content, and finish with a call-to-action or conclusion. CapCut has a speed control feature—perfect for speeding up boring sections (such as a lengthy process shot) or slowing down a pivotal moment to make it more impactful.
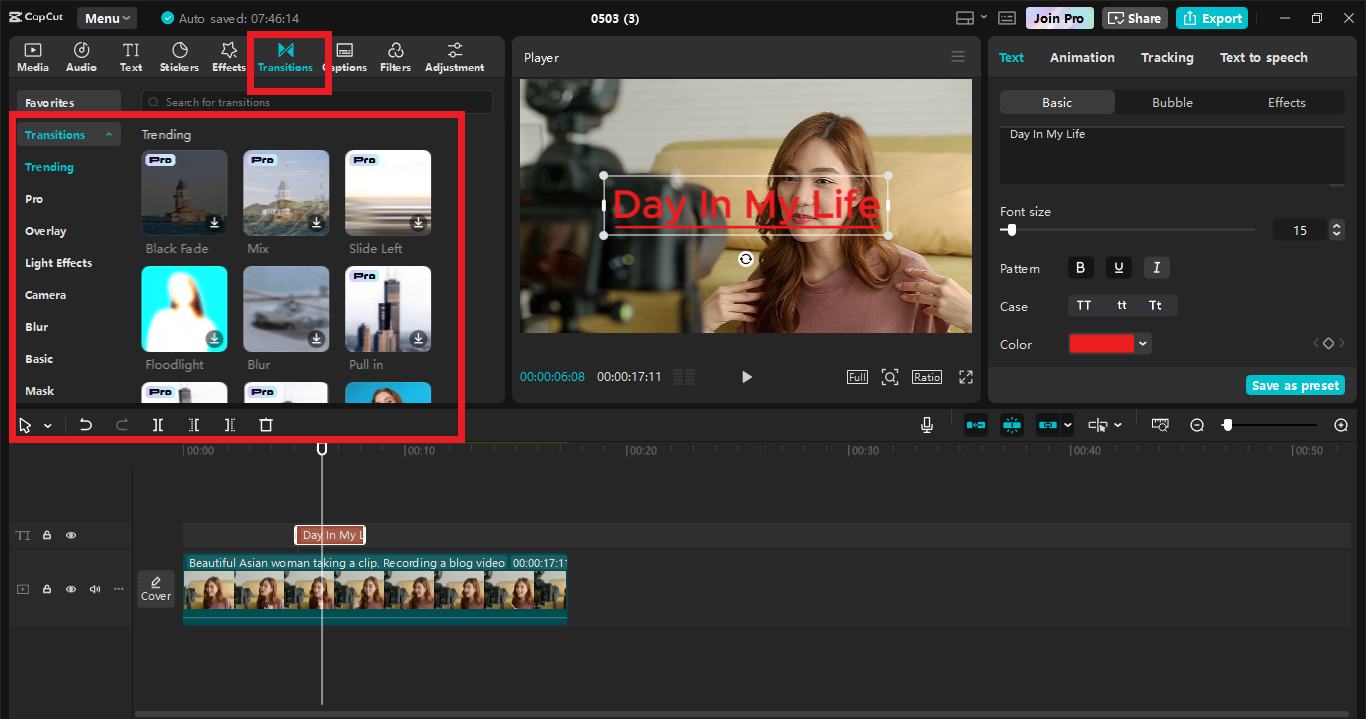
Step 3: Add Text, Transitions, and Music
A finished video doesn’t need to have flashy effects. But some simple improvements can give your videos a more deliberate and professional feel. Add Text and Titles by using CapCut Desktop Video Editor features. Employ Text > Add Text to add intros, step-by-step explanations, names, or commentary. For instance, “Day in My Life”. You can adjust fonts, colors, location, and animations.

You can also use transitions, as CapCut provides various transition templates. Rather than cutting directly from one scene to another, add transitions such as Fades, Slides, Zooms, and many more. CapCut has a library under the Transitions tab. Keep them simple and fast to maintain the flow.
If you want to add music or audio, CapCut Desktop Video Editor provides a list of royalty-free tracks. Click “Audio” to add background music. Balance the audio by adjusting volume levels. Use keyframes to fade music in or out. If you’re doing voiceovers, CapCut’s built-in voice changer tool lets you modify your narration’s tone or gender for stylistic variety or fun personalization.
Step 4: Add Branding or Reusable Elements
If you are editing videos on a daily basis for a business, personal brand, or social media channel, then consistency is what matters. Add a Logo or Watermark to your video. Drop your logo image in the timeline, put it in a corner, and modify transparency. Keep it present but subtle. If you’re using the same intro animation or music every day, save it in a folder. Just import and drag it into every new project for instant reuse.
Step 5: Export and Share
Once your revisions are done, it’s time to render the video and get it out into the world. Press “Export” at the top right. CapCut brings up an export settings dialog. Select different export settings, such as Resolution: Use 1080p for most everyday content. Go 4K only if necessary. MP4 is the standard format. 30fps is the best frame rate for everyday use of videos.
Use a file name such as daily_edit_0426.mp4 to be organized. Select your export folder, then click “Export.” Take one final look before uploading to spot typos or sync problems. CapCut exports are also optimized for playback. Upload straight away to YouTube, TikTok, Instagram, or wherever your content resides.

Final Thoughts
Video editing daily doesn’t have to be stressful. With CapCut Desktop, you possess everything you need to create great-looking, high-quality content, without the cost of expensive software or the hassle of a steep learning curve